Friday, 27 March 2015

Spring Game Submission - Group Project

For this project we were set the brief of working in a group of 3-4 and designing and creating a flying, shooter game. In our group of 3 we decided to take the idea from this brief and create a 3D flying space shooter. We all focused on various areas of the game in the group as well as all doing a piece of art and scripting each.

My job within the team was to work on the artwork side of the game, so I mainly worked up the original concepts for the game, paint overs, one sheet and texturing of models including the main game menu. I also worked on four scripts within in the game including the high score script within the game, high score display on the menu and the pause menu. I then also created some basic models for the game as I am not as confident with modelling as the other members of my team, but I did however try and model some space debris to fill up the levels, I created 3 basics box models in Maya and then took these into Mudbox and textured to bring them to life ready for the game.

Overall I am really pleased with my work within the game and feel I have worked well as part of a team focusing mainly on the art side but also doing a bit of everything including modelling and scripting to demonstrate I can do a bit of everything within a game. I feel our team has worked really well together and we have completed the task set in the brief and more by taking our own spin on the game and creating a fun, playable and visually appealing final outcome.


One sheet for game


Initial main ship concept


Alien AI ship concepts and final chosen concept


Rough planet concepts for the game levels


Paint over concept of the main ship for the game


Basic box models for space debris and textured models


Various scripts for game including high score system, high score display on main menu and pause menu in game


Final game main menu including textured main menu model I worked on


Main game levels in final game


Game play examples in game


Wednesday, 25 March 2015

Character Modelling Assignment

For this assignment we were set the task of box modelling a given character model from a concept to a finished, game ready model. We were set some limitations of not going about 8,000 Tri's in the basic box model and then texturing the final model in either Mudbox or Photoshop. I found this assignment difficult as a character is a lot more complicated to try and build out from the basic box model than the Trex, however I am really pleased with my final result and I have stuck to the given brief and feel as though I have completed the assignment to a good standard.


After I had completed the basic box model using the same techniques as used when modelling the Trex, I then UV unwrapped the model using the same technique as used when we modelled the Trex by using the cut and slice tools in the UV editor.


Automatic UV Unwrap


Planar UV Unwrap


Final Manual UV Unwrap ready for texturing


After I had completed the basic box model UV unwrapping, I then took the model into Mudbox and tried to texture the model using the paint over technique but found this unsuccessful and very flat looking, so I tried the Photoshop method, by selecting a face on the model, finding which part this was on the UV unwrap and then on the same UV unwrap in Photoshop using the selection tool going around and selecting the part of the model, filling with colour matched from the original image and then saved and reloaded on the Maya file. I felt this method worked much better and gave a more realistic look and feel to the overall model.


Unsuccessful Mudbox textured model


Final textured model using the Photoshop method


Monday, 23 March 2015

Anthropomorphic Design Assignment

For this assignment we were set the task of creating a anthropomorphic design using a exotic frog or toad as reference for our concepts.

To start off the assignment I first began by creating a visual board of all my reference and inspiration for my own designs looking at real life images of exotic frogs and toads along with other artists concepts of frogs and humanoid frog characters.


I then created some rough studies in Photoshop based on my research of real life frogs and toads and created three studies from some images from my visual board, looking at what makes a frog, frog like and what features I would need to bring forwards into the final design.


I then created some rough silhouettes to get some basic shapes going for my own frog design, I tried three different ideas, the first looked as though he was standing and holding something, the second standing with his hands in the air in an excited stance and the third crouched down on the floor.


I decided the first silhouette looked the best and gave me the most options for my final design so I then took this silhouette forward and started by creating an outline and then refining and adding details to create my final frog concept. I decided to keep the style of this painting cartoony with quite flat colours and basic textures to appeal to my chosen audience of children/young adults.


Overall I am really pleased with my final design and feel as though I have approached this assignment effectively and created an unique and interesting outcome that clearly shows the idea of a frog/toad with the anthropomorphic design to add that human side to the concept.


Street Scene Texturing

For this assignment we were set the task of texturing a given alley/street scene with provided textures using the UV snapshot method from Maya and then taking this into Photoshop and applying the textures and painting to create the overall street scene. Within Maya we also learned to use different layer methods to add different effects such as diffuse and specular lighting with the textures we had created to create metal and more simple textures. I am really pleased with how my final scene came out as I feel it shows I have learnt this method well and added my own take on it with the texturing to bring the scene to life and it has also encouraged me to try this method again in future as I found it to be a quick and effective way to texture a model.


Given street scene model


Final textured street scene model


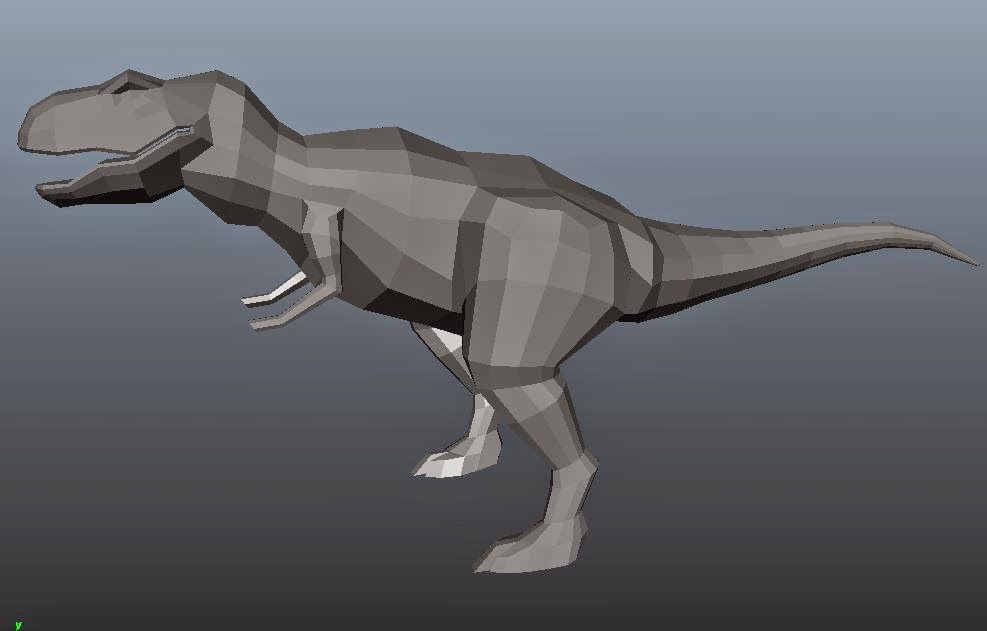
Trex Box Model - Maya

Over the course of a few lessons we were set the task of learning to box model a Trex to show the process from start to finish before texturing in a programme such as Mudbox.

 In the first session we began by modelling the main body and head of the Trex using basic box modelling techniques by starting with a cube and extruding out faces and edges to create the overall shape of the Trex based on a given concept. In the second session we worked on the hands and legs building them again off of the previous box model by using the extruding techniques. Once the overall box model of the Trex was complete and I was happy with how it compared to the provided concept we then spent the last session learning how to UV unwrap the box model correctly by splitting the UVs in Maya to then make the overall model easier to texture in Mudbox, as the previous textured Trex session showed.

I found this assignment useful as it has taught me the basics of box modelling from start to finish to create an effective final model ready for texturing and I will continue to use this process in the future on my own models.


Starting off the box model


Main body of the Trex box modelled


Trex box model with arms and legs added


Finished Trex box model and UV unwrapped


Automatic UV Unwrap


Cut and split UV Unwrap